Integrating webhooks
Learn how to integrate webhooks into your Actors. Webhooks are a super powerful tool, and can be used to do almost anything!
In this lesson we'll be writing a new Actor and integrating it with our beloved Amazon scraping Actor. First, we'll navigate to the same directory where our demo-actor folder lives, and run apify create filter-actor (once again, you can name the Actor whatever you want, but for this lesson, we'll be calling the new Actor filter-actor). When prompted about the programming language, select JavaScript:
$ apify create filter-actor
? Choose the programming language of your new Actor:
❯ JavaScript
  TypeScript
  Python
Then use the arrow down key to select Empty JavaScript Project:
$ apify create filter-actor
✔ Choose the programming language of your new Actor: JavaScript
? Choose a template for your new Actor. Detailed information about the template will be shown in the next step.
  Crawlee + Playwright + Chrome
  Crawlee + Playwright + Camoufox
  Bootstrap CheerioCrawler
  Cypress
❯ Empty JavaScript Project
  Standby JavaScript Project
  ...
As a last step, confirm the choices by Install template and wait until our new Actor is ready.
Building the new Actor
First of all, we should clear out any of the boilerplate code within main.js to get a clean slate:
// main.js
import { Actor } from 'apify';

await Actor.init();

// ...

await Actor.exit();
We'll be passing the ID of the Amazon Actor's default dataset along to the new Actor, so we can expect that as an input:
const { datasetId } = await Actor.getInput();
const dataset = await Actor.openDataset(datasetId);
// ...
You will need to use forceCloud option - Actor.openDataset(<name/id>, { forceCloud: true }); - to open dataset from platform storage while running Actor locally.
Next, we'll grab hold of the dataset's items with the dataset.getData() function:
const { items } = await dataset.getData();
While several methods can achieve the goal output of this Actor, using the Array.reduce() is the most concise approach
const filtered = items.reduce((acc, curr) => {
    // Grab the price of the item matching our current
    // item's ASIN in the map. If it doesn't exist, set
    // "prevPrice" to null
    const prevPrice = acc?.[curr.asin] ? +acc[curr.asin].offer.slice(1) : null;

    // Grab the price of our current offer
    const price = +curr.offer.slice(1);

    // If the item doesn't yet exist in the map, add it.
    // Or, if the current offer's price is less than the
    // saved one, replace the saved one
    if (!acc[curr.asin] || prevPrice > price) acc[curr.asin] = curr;

    // Return the map
    return acc;
}, {});
The results should be an array, so we can take the map we just created and push an array of its values to the Actor's default dataset:
await Actor.pushData(Object.values(filtered));
Our final code looks like this:
import { Actor } from 'apify';

await Actor.init();

const { datasetId } = await Actor.getInput();
const dataset = await Actor.openDataset(datasetId);

const { items } = await dataset.getData();

const filtered = items.reduce((acc, curr) => {
    const prevPrice = acc?.[curr.asin] ? +acc[curr.asin].offer.slice(1) : null;
    const price = +curr.offer.slice(1);

    if (!acc[curr.asin] || prevPrice > price) acc[curr.asin] = curr;

    return acc;
}, {});

await Actor.pushData(Object.values(filtered));

await Actor.exit();
Cool! But wait, don't forget to configure the INPUT_SCHEMA.json file as well! It's not necessary to do this step, as we'll be calling the Actor through Apify's API within a webhook, but it's still good to get into the habit of writing quality input schemas that describe the input values your Actors are expecting.
{
    "title": "Amazon Filter Actor",
    "type": "object",
    "schemaVersion": 1,
    "properties": {
        "datasetId": {
            "title": "Dataset ID",
            "type": "string",
            "description": "Enter the ID of the dataset.",
            "editor": "textfield"
        }
    },
    "required": ["datasetId"]
}
Now we're done, and we can push it up to the Apify platform with the apify push command:
$ apify push
Info: Created Actor with name filter-actor on Apify.
Info: Deploying Actor 'filter-actor' to Apify.
Run: Updated version 0.0 for Actor filter-actor.
Run: Building Actor filter-actor
(timestamp) ACTOR: Extracting Actor documentation from README.md
(timestamp) ACTOR: Building Docker image.
...
(timestamp) ACTOR: Pushing Docker image to repository.
(timestamp) ACTOR: Build finished.
Actor build detail https://console.apify.com/actors/Yk1bieximsduYDydP#/builds/0.0.1
Actor detail https://console.apify.com/actors/Yk1bieximsduYDydP
Success: Actor was deployed to Apify cloud and built there.
Setting up the webhook
We'll use the Apify API to set up the webhook. To compose the HTTP request, we'll need either the ID of our Actor or its technical name. Let's take a second look at the end of the output of the apify push command:
...
Actor build detail https://console.apify.com/actors/Yk1bieximsduYDydP#/builds/0.0.1
Actor detail https://console.apify.com/actors/Yk1bieximsduYDydP
Success: Actor was deployed to Apify cloud and built there.
The URLs tell us that our Actor's ID is Yk1bieximsduYDydP. With this actorId, and our token, which is retrievable through Settings > Integrations on the Apify Console, we can construct a link which will call the Actor:
https://api.apify.com/v2/acts/Yk1bieximsduYDydP/runs?token=YOUR_TOKEN_HERE
We can also use our username and the name of the Actor like this:
https://api.apify.com/v2/acts/USERNAME~filter-actor/runs?token=YOUR_TOKEN_HERE
Whichever one you choose is totally up to your preference.
Next, within the Amazon scraping Actor, we will click the Integrations tab and choose Webhook, then fill out the details to look like this:
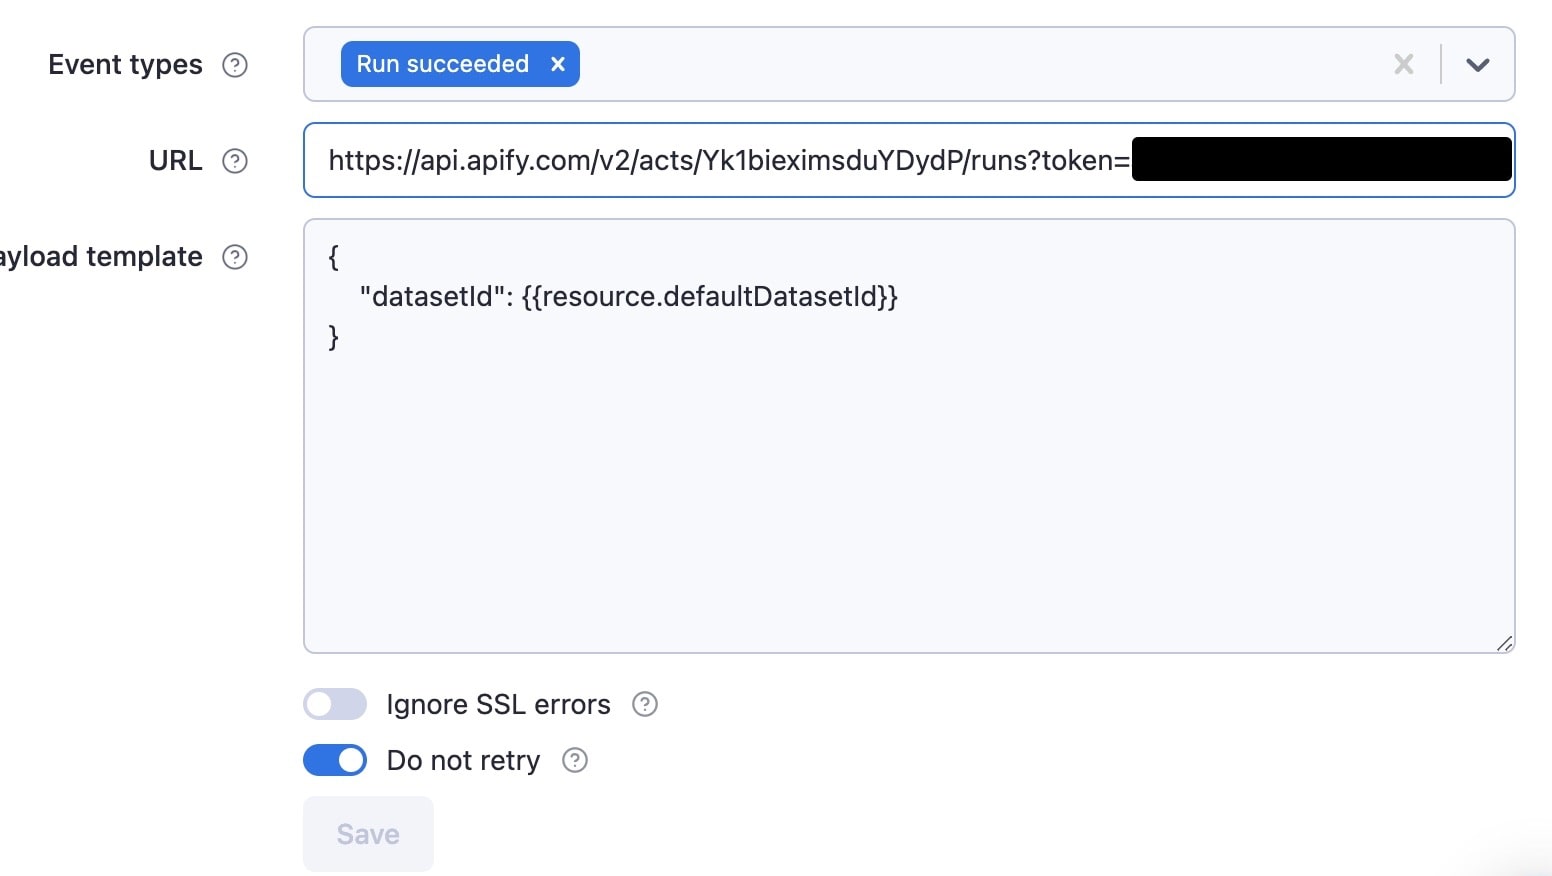
We have chosen to run the webhook once the Actor has succeeded, which means that its default dataset will surely be populated. Since the filtering Actor is expecting the default dataset ID of the Amazon Actor, we use the resource variable to grab hold of the defaultDatasetId.
Click Save, then run the Amazon demo-actor again.
Making sure it worked
If everything worked, then at the end of the demo-actor's run, we should see this within the Integrations tab:

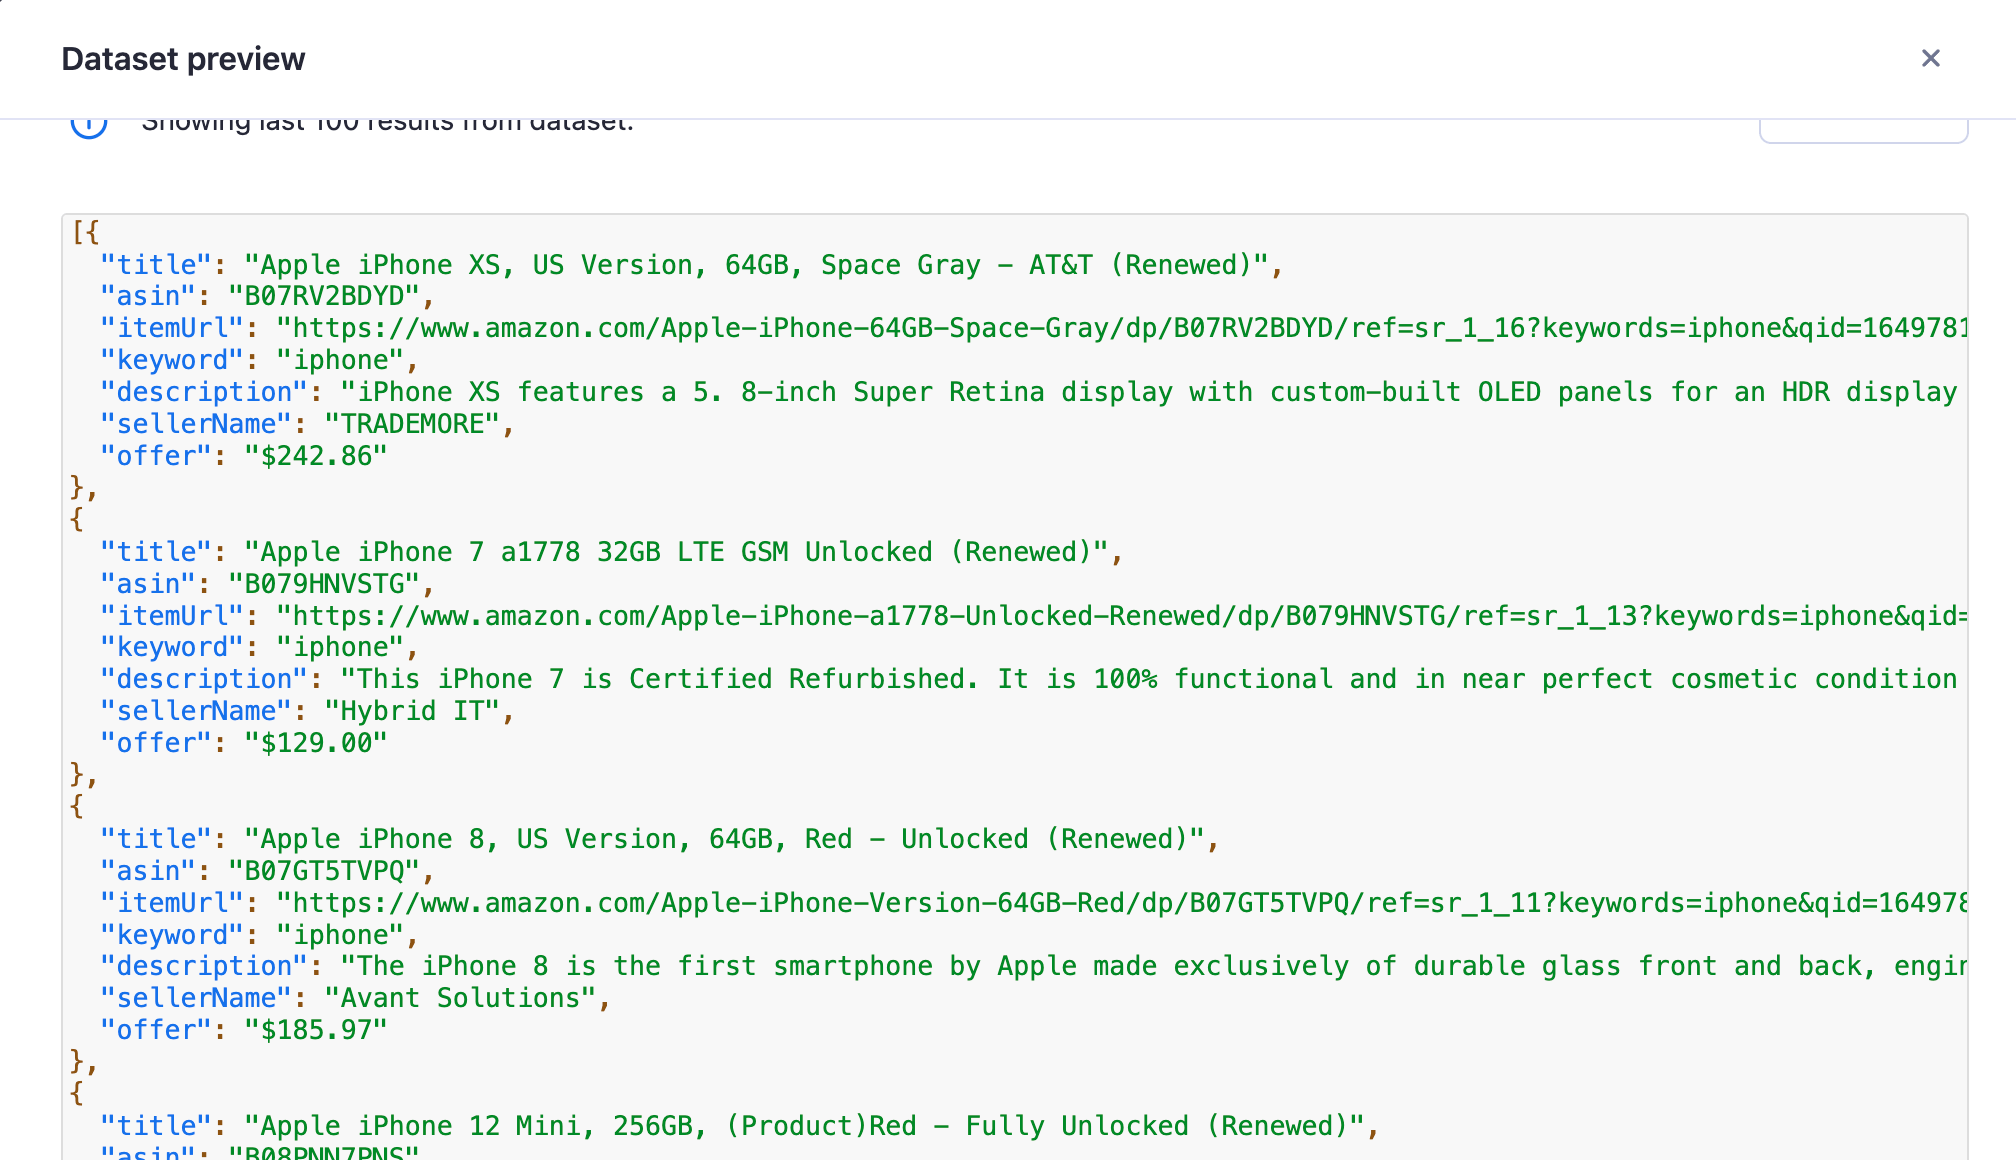
Additionally, we should be able to see that our filter-actor was run, and have access to its dataset:
Quiz answers 📝
Q: How do you allocate more CPU for an Actor's run?
A: On the platform, more memory can be allocated in the Actor's input configuration, and the default allocated CPU can be changed in the Actor's Settings tab. When running locally, you can use the APIFY_MEMORY_MBYTES environment variable to set the allocated CPU. 4GB is equal to 1 CPU core on the Apify platform.
Q: Within itself, can you get the exact time that an Actor was started?
A: Yes. The time the Actor was started can be retrieved through the startedAt property from the Actor.getEnv() function, or directly from process.env.APIFY_STARTED_AT
Q: What are the types of default storages connected to an Actor's run?
Every Actor's run is given a default key-value store and a default dataset. The default key-value store by default has the INPUT and OUTPUT keys. The Actor's request queue is also stored.
Q: Can you change the allocated memory of an Actor while it's running?
A: Not while it's running. You'd need to stop it and run a new one. However, there is an option to soft abort an Actor, then resurrect then run with a different memory configuration.
Q: How can you run an Actor with Puppeteer on the Apify platform with headless mode set to false?
A: This can be done by using the actor-node-puppeteer-chrome Docker image and making sure that launchContext.launchOptions.headless in PuppeteerCrawlerOptions is set to false.
Wrap up
See that?! Integrating webhooks is a piece of cake on the Apify platform! You'll soon discover that the platform factors away a lot of complex things and allows you to focus on what's most important - developing and releasing Actors.